
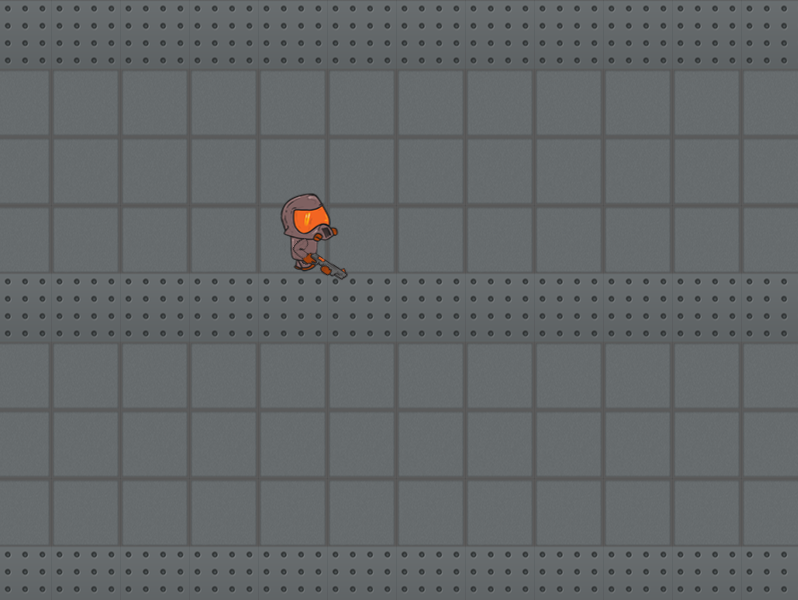
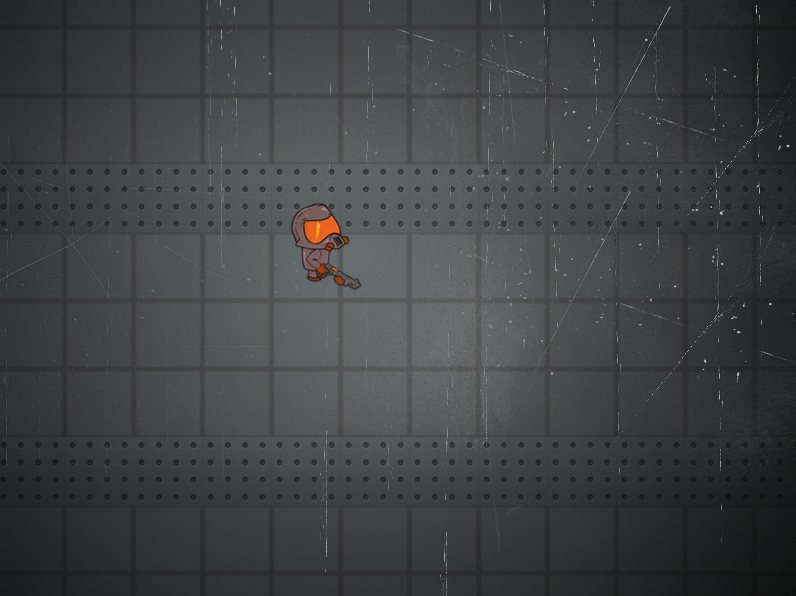
It's time to start contributing back to the community so here's one tutorial on a subject I've noticed a lot of people get stuck on. I wanted to create a transparent gradient from center of the screen where it's clear to the edges where it's dark, like light effect. So here's a screenshot from a game we're currently developing before and after applying this effect.
TL;DR
This is the first lesson and you're probably here to copy paste, see if it works and move on, so I'm going to try to make this as easy as possible for you. For a longer version scroll down.
/**
* @param size of the screen {width: 800, height: 800}
* @param renderer just pass the renderer
*/
var Light = function(size, renderer){
  var self = this;
  self.size = size;
  self.renderer = renderer;

  self.container = new PIXI.Container();

  self.canvas = document.createElement('canvas');
  self.canvas.width = size.width;
  self.canvas.height = size.height;
  self.ctx = self.canvas.getContext('2d');

  self.renderTexture = PIXI.RenderTexture.create(self.size.width, self.size.height);
  self.maskSprite = new PIXI.Sprite(self.renderTexture);

  self.rendMask();

  self.darkTex = new PIXI.Texture.fromImage("assets/overlay2.jpg");
  self.darkSprite = new PIXI.Sprite(self.darkTex);
  self.darkSprite.filters = [new PIXI.SpriteMaskFilter(self.maskSprite)];
  self.container.addChild(self.darkSprite);
}

var pt = Light.prototype;

pt.rendMask = function(center, smallLights){
  var self = this;

  if(!center){
    return false;
    center = {
      x: 400,
      y: 300
    }
  } else {
    center.x = center.x;
    center.y = center.y;
  }

  self.ctx = self.canvas.getContext('2d');

  self.ctx.clearRect(0,0,800,600);
  var gradient = self.ctx.createRadialGradient(center.x, center.y, 1, center.x, center.y, 600);
  gradient.addColorStop(0,"black");
  gradient.addColorStop(1,"white");
  self.ctx.fillStyle = gradient;
  self.ctx.fillRect(0,0,800,600);

  if(!self.spr){
    var texture = new PIXI.Texture.fromCanvas(self.canvas);
    self.spr = new PIXI.Sprite(texture);
  } else {
    self.spr.texture.update();
  }
  self.renderer.render(self.spr, self.renderTexture, true);
}

//module.exports = Light;
var light = new Light({width:800, height: 600}, renderer);

stage.addChild(light.container);
and use in code like this:
light.rendMask({x: renderer.plugins.interaction.mouse.global.x, y: renderer.plugins.interaction.mouse.global.y}, []);
Initial setup
I'll try to make this as simple as possible so I'll use first basic example from pixi.js, i have this files and directory structure:
./
./assets/bunny.png
./assets/overlay2.jpg
./lib/pixi.js
./index.html
./main.js
here's index.html
<!DOCTYPE HTML>
<html>
<head>
     <meta charset="UTF-8">
    <title>Proclive Tutorials: Light</title>
    <style>
        body {
            margin: 0;
            padding: 0;
            background-color: #000000;
        }
    </style>
    <script src="lib/pixi.js"></script>
</head>
<body>
  <script src="main.js"></script>
</body>
</html>
main.js
var renderer = PIXI.autoDetectRenderer(800, 600,{backgroundColor : 0x1099bb});
document.body.appendChild(renderer.view);

// create the root of the scene graph
var stage = new PIXI.Container();

// create a texture from an image path
var texture = PIXI.Texture.fromImage('assets/bunny.png');

// create a new Sprite using the texture
var bunny = new PIXI.Sprite(texture);

// center the sprite's anchor point
bunny.anchor.x = 0.5;
bunny.anchor.y = 0.5;

// move the sprite to the center of the screen
bunny.position.x = 200;
bunny.position.y = 150;

stage.addChild(bunny);

// start animating
animate();
function animate() {
    requestAnimationFrame(animate);

    // just for fun, let's rotate mr rabbit a little
    bunny.rotation += 0.1;

    // render the container
    renderer.render(stage);
}
Fun part
Ok, time to put that bunny in the dark now.
For my game i have used this image to add scratches on the screen, you don't need to use it if you want clear transitions. Your choice. Anyway, here's the image I'm using (it's .jpg, no transparency yet)
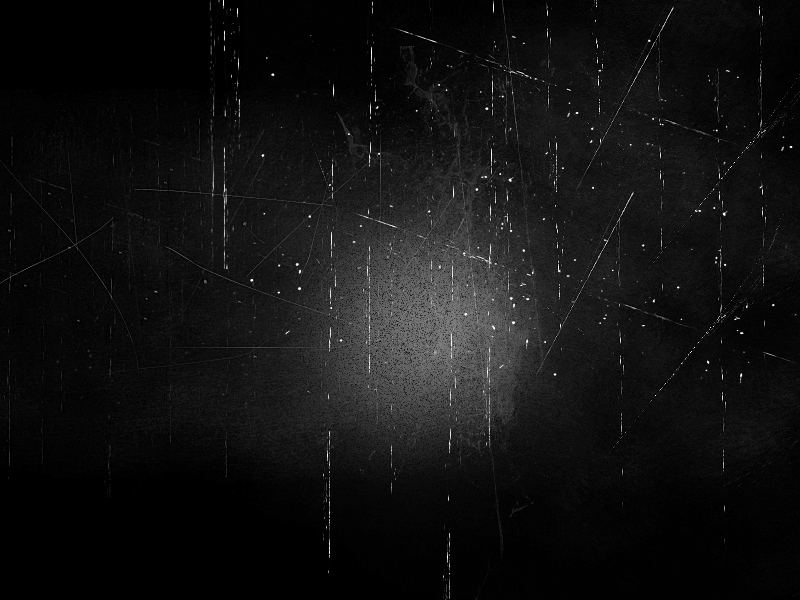
and to make it work just append this code:
/**
* @param size of the screen {width: 800, height: 800}
* @param renderer just pass the renderer
*/
var Light = function(size, renderer){
  var self = this;
  self.size = size;
  self.renderer = renderer;

  self.container = new PIXI.Container();

  self.canvas = document.createElement('canvas');
  self.canvas.width = size.width;
  self.canvas.height = size.height;
  self.ctx = self.canvas.getContext('2d');

  self.renderTexture = PIXI.RenderTexture.create(self.size.width, self.size.height);
  self.maskSprite = new PIXI.Sprite(self.renderTexture);

  self.rendMask();

  self.darkTex = new PIXI.Texture.fromImage("assets/overlay2.jpg");
  self.darkSprite = new PIXI.Sprite(self.darkTex);
  self.darkSprite.filters = [new PIXI.SpriteMaskFilter(self.maskSprite)];
  self.container.addChild(self.darkSprite);
}

var pt = Light.prototype;

pt.rendMask = function(center, smallLights){
  var self = this;

  if(!center){
    return false;
    center = {
      x: 400,
      y: 300
    }
  } else {
    center.x = center.x;
    center.y = center.y;
  }

  self.ctx = self.canvas.getContext('2d');

  self.ctx.clearRect(0,0,800,600);
  var gradient = self.ctx.createRadialGradient(center.x, center.y, 1, center.x, center.y, 600);
  gradient.addColorStop(0,"black");
  gradient.addColorStop(1,"white");
  self.ctx.fillStyle = gradient;
  self.ctx.fillRect(0,0,800,600);

  if(!self.spr){
    var texture = new PIXI.Texture.fromCanvas(self.canvas);
    self.spr = new PIXI.Sprite(texture);
  } else {
    self.spr.texture.update();
  }
  self.renderer.render(self.spr, self.renderTexture, true);
}

//module.exports = Light;
var light = new Light({width:800, height: 600}, renderer);

stage.addChild(light.container);
and modify animate() function to look like this:
function animate() {
    requestAnimationFrame(animate);

    // just for fun, let's rotate mr rabbit a little
    bunny.rotation += 0.1;
    if(light){
      light.rendMask({x: renderer.plugins.interaction.mouse.global.x, y: renderer.plugins.interaction.mouse.global.y}, []);
    }
    // render the container
    renderer.render(stage);
}
and the final (but simplified) product looks like this:
(mouse over it to see it in action)
I had to strip my code down for the purpose of this tutorial, in original code i have implemented passing an array of small lights which i use for ambient and for glow on bullets. It's a bit more complicated in that case and it's CPU intensive but that can be fixed if you use smaller canvas size and scale it backup up to the screen size, in that case light is a bit pixelated but effective way to use in games without sacrificing too much resources for a single effect. If you're interested drop me a comment and I might write part II or expand this post to include it.