
Hello folks! In this tutorial I will show you how to create a character using frame animation in Photoshop CC 2015, but the steps should be similar in other versions.
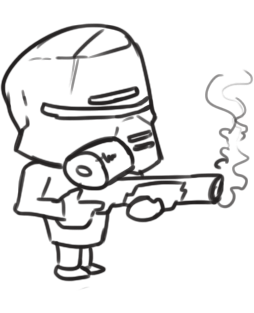
Finished product
This is a npc character from our upcoming game Trooper, which will be a fun and cool 2D shooter, with signature style and enemies. We are doing all of our animations in "frame by frame"(pretty awesome, right?). I chose this type of character for the tutorial because it only has two actions: "walking" and "idle". Let's break down all the steps and then you can watch the video at the bottom of this post.
Alright, let's get started!
Step 1: Drawing
Choose your character or draw something similar, whatever you like. Style and coloring is not important, be creative.
Start with a sketch and try to visualize how your character will look and what parts will be animated.
 The most important thing is to draw all the body parts in different layers. In this case, we have a non playable character that doesn't have so much actions so I separated the head, body and legs(leg-front and leg-back).
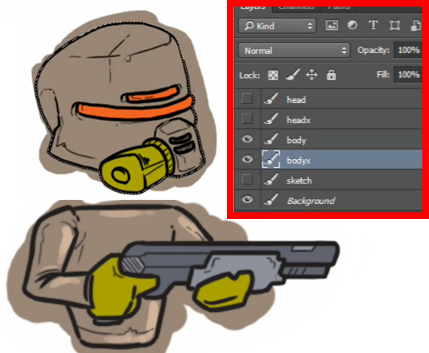 As you can see I have layers for the lineart(head, body, legf,legb) and colors(headx,bodyx,legfx and legbx) of each part of our soldier.
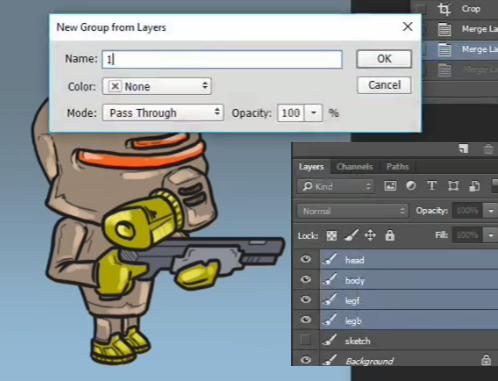
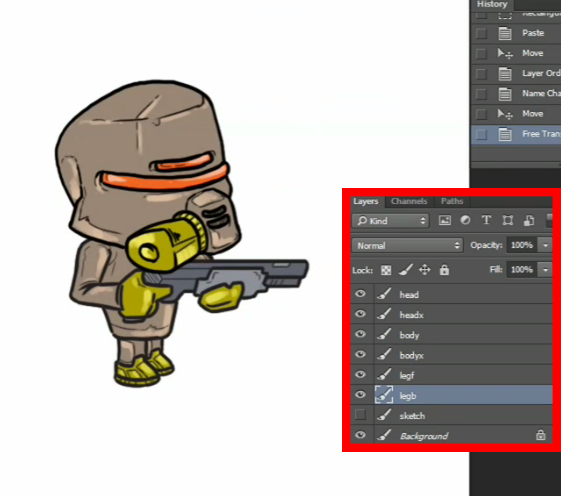 When I'm happy and satisfied with the finished look of my character I merge the matching layers and I create a group, in this case called "1". That will be the first frame for our animation.
Fun facts:
Sometimes you can make things easier. I simply copied the front leg, reduced the size and there you go...now you have both legs.
You can notice that my lineart for the head wasn't the same color as the rest of our soldier. I had to do some color blending for my "head" layer. Mistakes do happen but there is always a way to correct them as you go. :)
Step 2: Animation
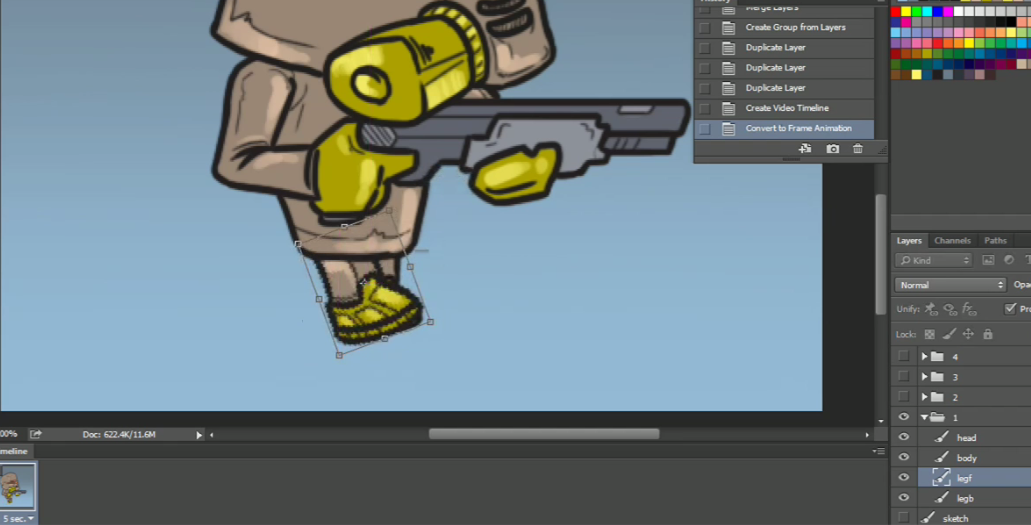
After our soldier/character is all nice and ready we can start bringing him to life. I copied the group 3 more times so all together I have 4 same groups. I've done this many times so I kinda know up front that I will need 4 frames for walking. For each frame a matching group(frame 1=group 1,frame 2 =group 2,etc). You don't have to do things like this, you can just start with first one and copy it as you go.
First open up the Timeline window. Go to the top navigation, choose Window > Timeline. The Timeline will let you turn on and off or move different layers for each frame.
 The Timeline window will appear at the bottom of your screen. In the Timeline window, click "Create Frame Animation".
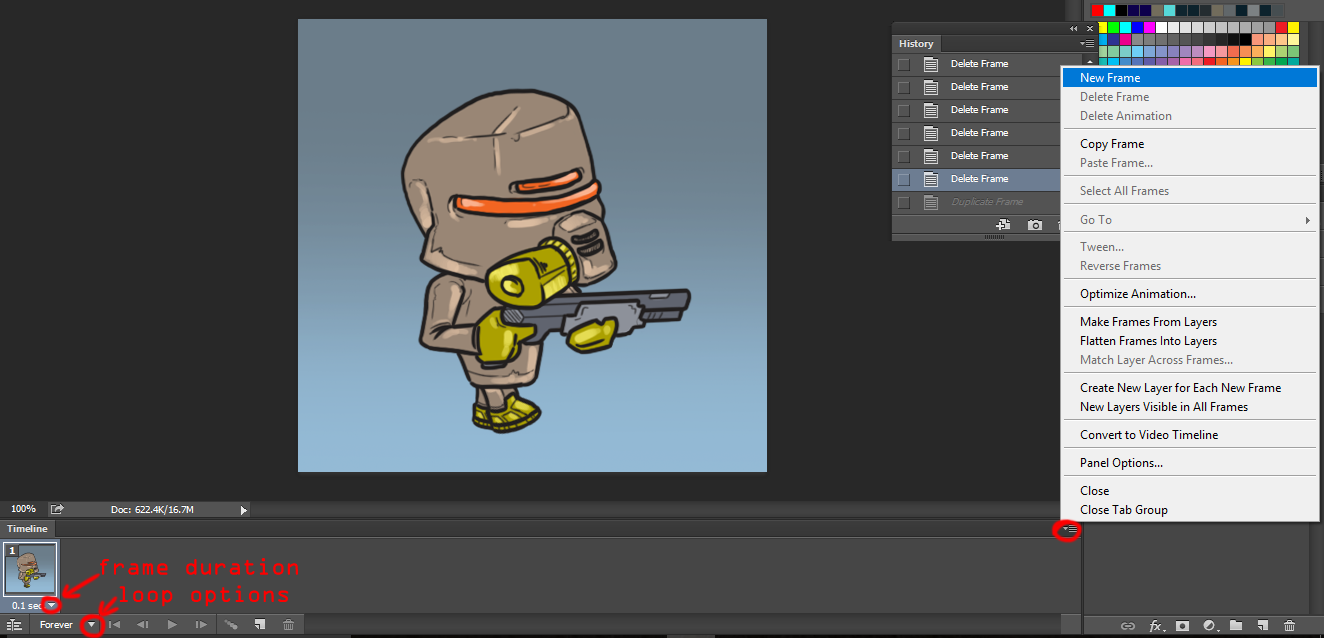
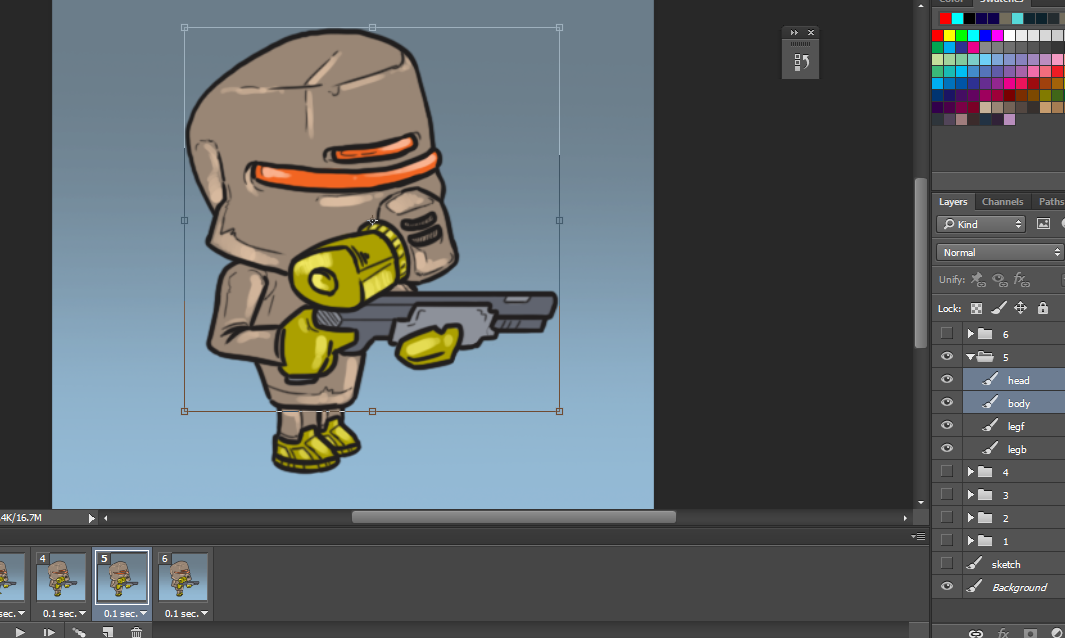
 Your Timeline should look something like this. I have marked the important things that you can change/edit.
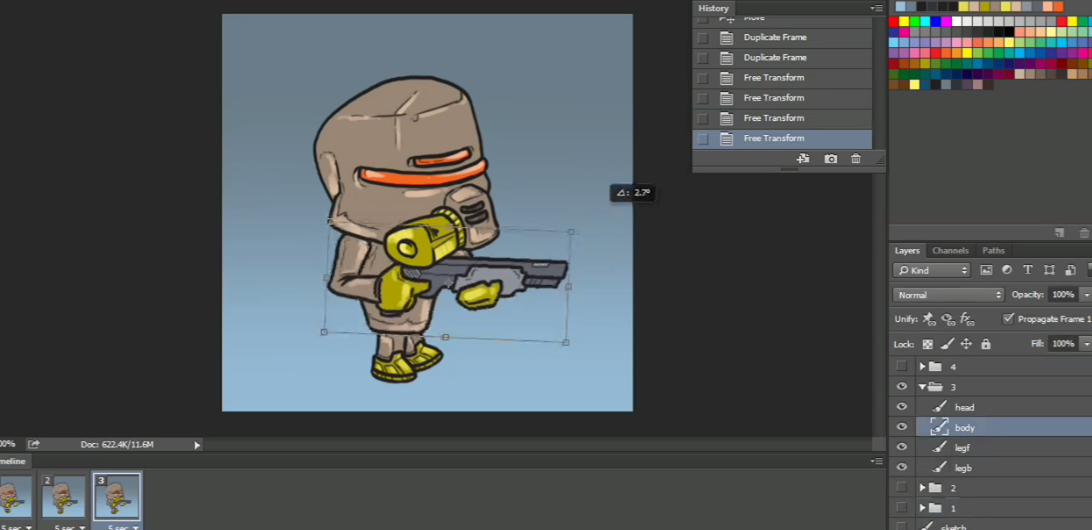
 For each frame you can choose which layers/groups will be visible or you can move different parts of our solider to create movement. For frame 1 you turn on just group 1, for frame 2 just group 2, etc. When you click on the first frame it will show that the group "1" is only visible. So you choose layer legf(front) and you move it as the character is walking.
 Repeat the process with other frames, try to experiment and play with the movement of the character as you like.
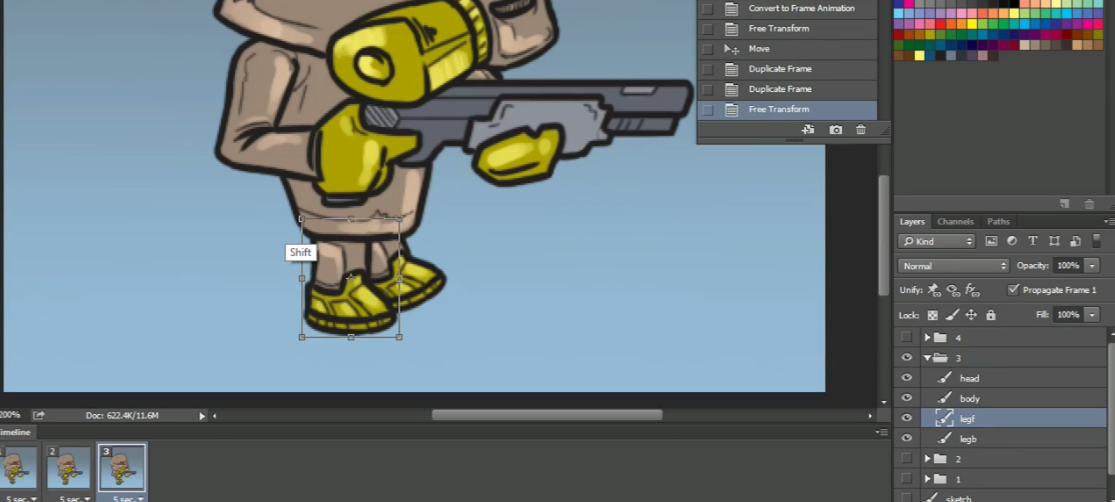 This is the process of "walking". As you can see I'm moving his body and head a little because people do lean a bit when they are walking. Try to add small details like that.
 For the "idle" process i just wanted to look like that the character is breathing. Of course, you have to create new frames and matching groups, in this case it was two new frames. I just moved "head" and "body" down a little for one frame to create movement.
 You can always click "play" button at the bottom of the panel to see your animation and look for mistakes. Always remember, if you want to draw/add new things just create a new layer and copy it if you need it for more than one frame.
Step 3: Exporting
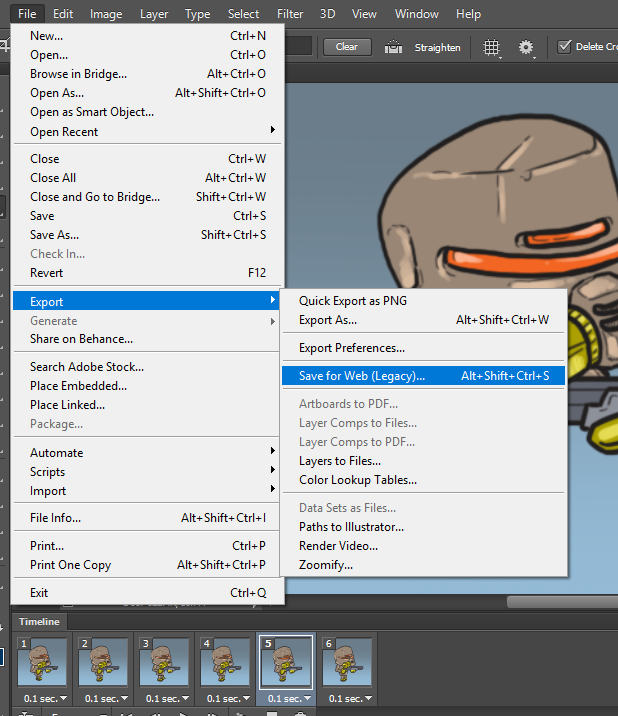
If you're happy with your animation and want to save it as a gif to use it online(or just brag about it to your friends), go to the top navigation bar and click File > Export > Save for Web (Legacy).
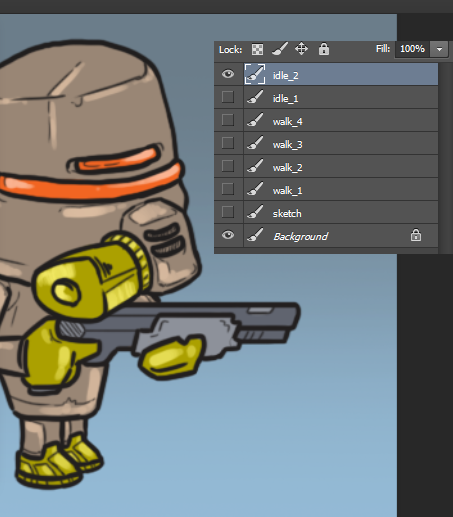
 If you want to export each layer cos you need them for sprite sheets(like we do in Proclive) the first thing to do is to merge your layers in each group and rename them as you wish.
 I had problems with exporting cos when I would select all the layers in the layer panel and then Right Click > Quick Export as PNG the Photoshop would trim the transparent pixels and the images won't be the same size.
You can always click on File > Export > Quick Export as PNG but you will need to do that for each frame and it can take a lot of time when you have many frames.
So, the best way to do this, go to the top navigation bar and click File > Export > Layers To files. I'm not sure if the older versions have this option but this is the easiest way to export your layers.
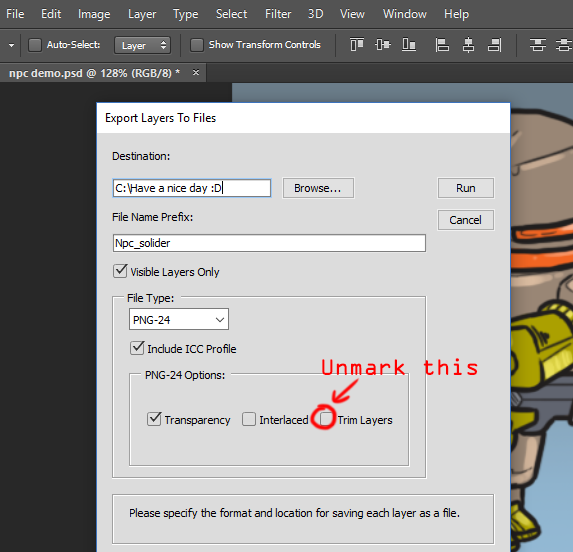 After I export my layers I use TexturePacker to create sprite sheets. I know there are maybe some scripts for
Photoshop but I find this program very easy to use.
I hope you guys liked this tutorial and enjoy the video.